Recently, I’ve been working on a bunch of Java side projects. Every time, I manually did git push then pull, compiled, packaged, and ran them, which felt pretty low-tech.
Especially after buying a bunch of cloud servers across different regions, as the scale expanded, the efficiency of manual operations and maintenance dropped drastically.
This blog site actually uses GitHub Actions to automatically trigger compilation and deployment. Once I finish writing an article locally, a simple git push completes the publishing process.
Therefore, I plan to use CI tools for automated deployment and O&M for Java-related projects as well. Having worked as an SRE for several years, and with Alibaba Cloud Yunxiao being similar to the internal CI tools I use daily at work, I got up to speed very quickly.
Java Project Maven Configuration
The Java project structure is:
gateway
|-starter
|-tb
The main entry class is in starter, while tb mainly contains business logic.
I tried a few packaging plugins, but found that executing the JAR packaged from starter did not include the tb module.
Therefore, I used maven-shade-plugin as the packaging plugin.
1 | <build> |
finalName is set to starter to specify the file name of the output JAR package, avoiding having to modify the deployment script whenever the package version is upgraded.
Main-Class specifies the application entry class to avoid situations where the startup class cannot be found.
Writing the Deployment Script
I had a large language model write it for me—just describe the requirements clearly.
Although killing the process isn’t very graceful, it works for now.
1 | 我通过持续集成工具,将starter.jar部署到/root/app文件夹 |
Got the script and named it deploy.sh.
1 |
|
Place it in the resources folder of the starter module. Of course, it can also be placed in other folders to be copied and executed by the CI tool.
Configuring Alibaba Cloud Yunxiao Code Repository
Yunxiao is excessively slow when pulling from GitHub—sometimes taking over 10 minutes without finishing, which blocks downstream processes. Furthermore, pull execution time consumes resource quota (3,000 core-minutes are provided free per month).
Therefore, I synced a copy of the GitHub code to Code Management and configured .git/config to automatically push to both targets whenever git push is executed.
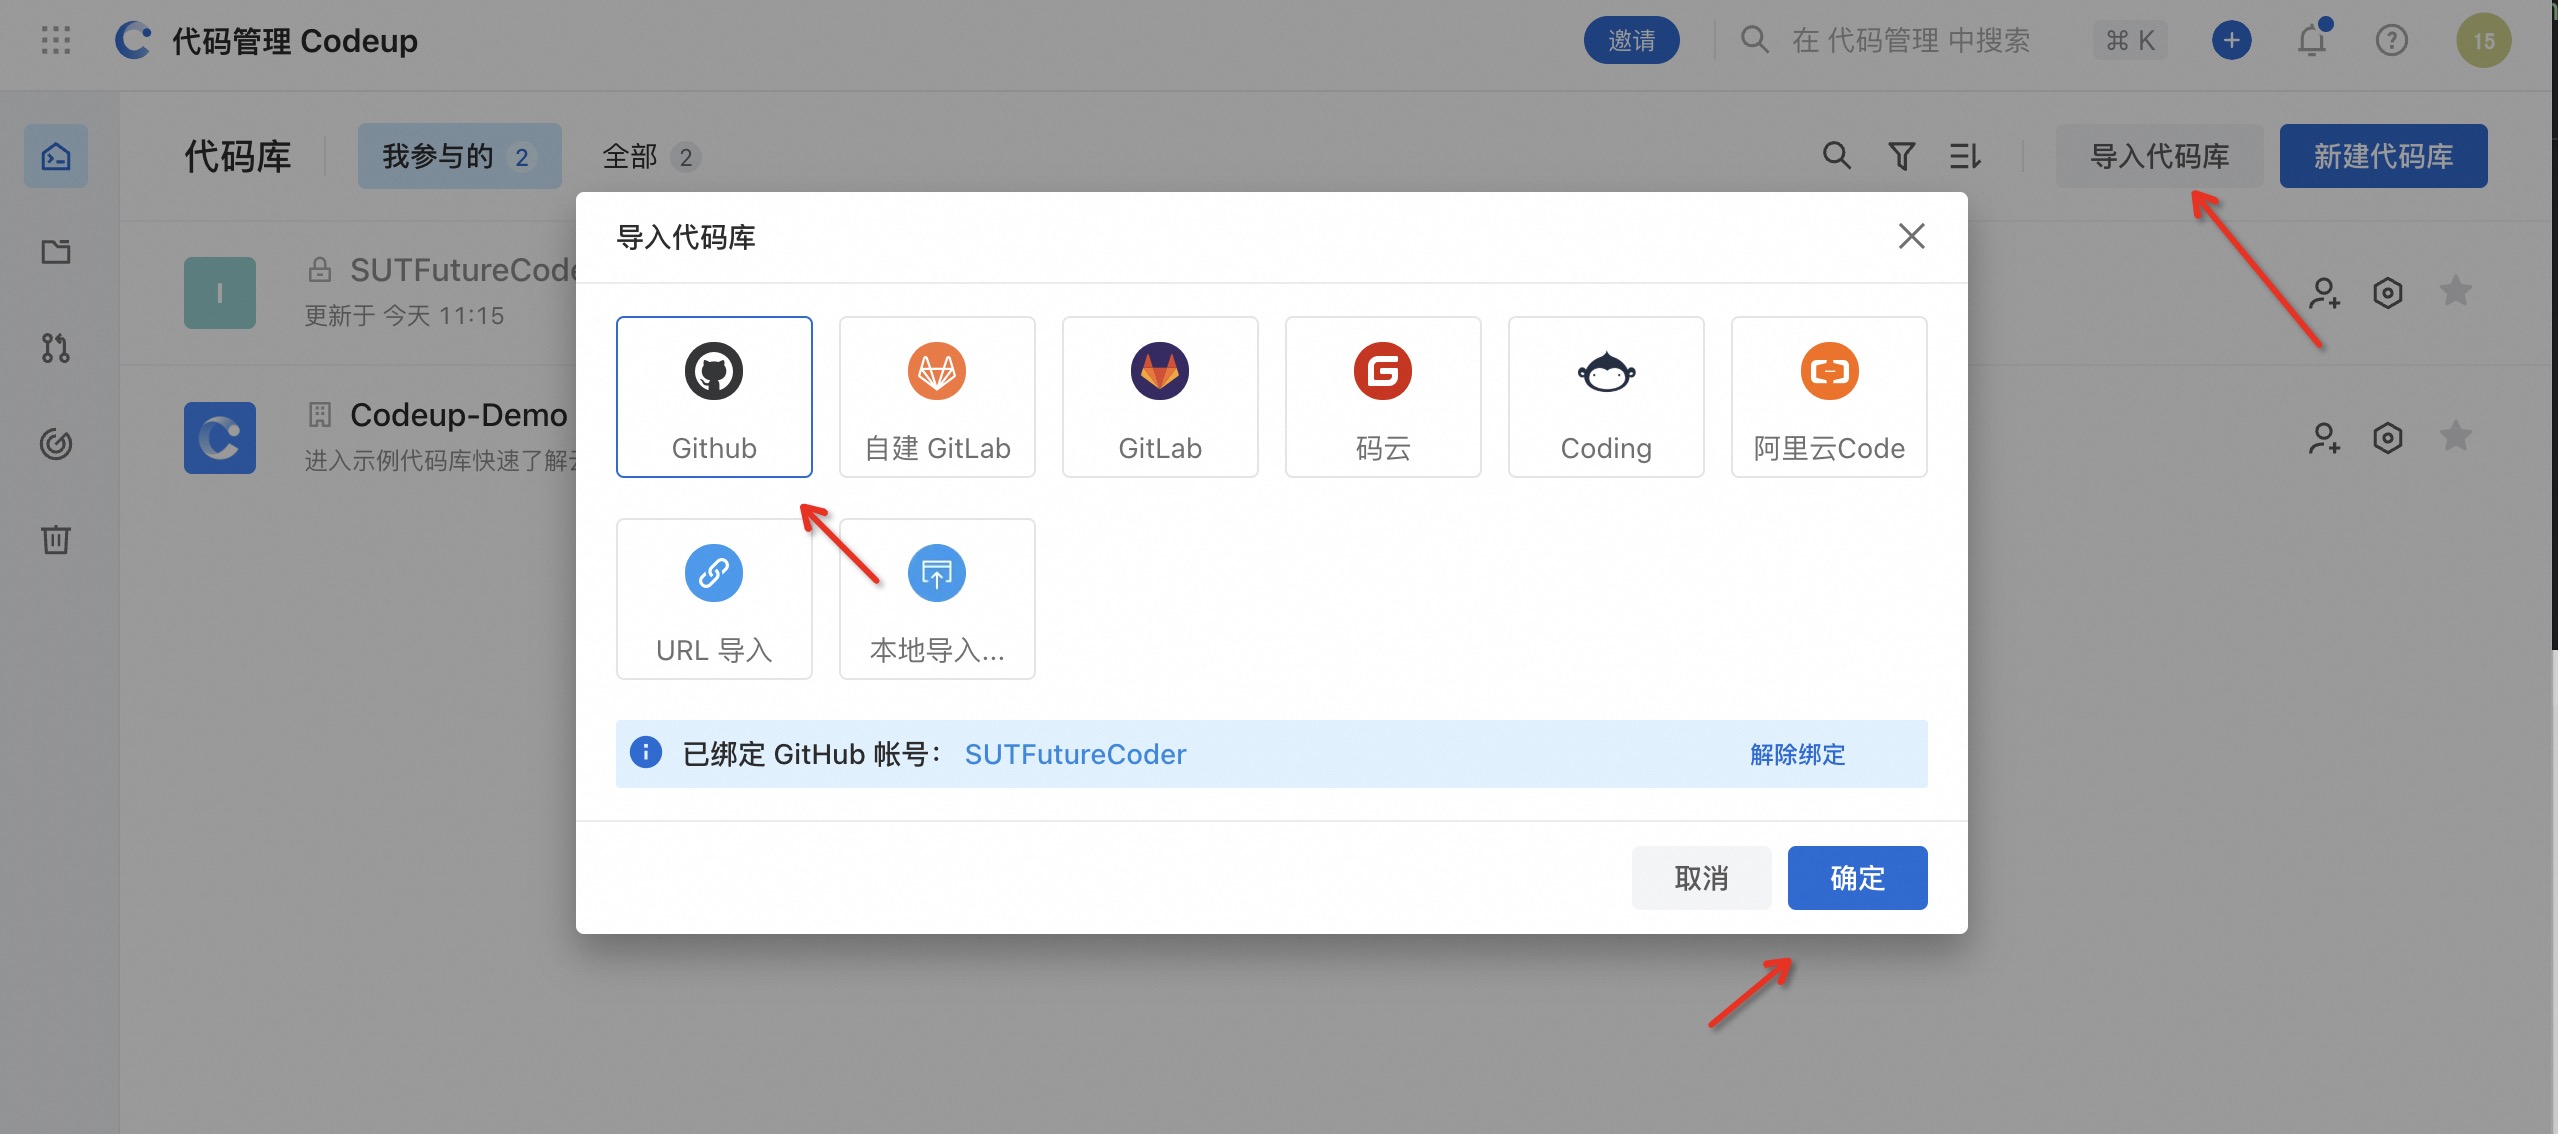
For detailed steps, simply refer to the official documentation, and then configure your local RSA public key in the Yunxiao code repository.
The .git/config configuration is as follows, with two target URLs configured under remote "origin".
1 | [core] |
Configuring the Pipeline
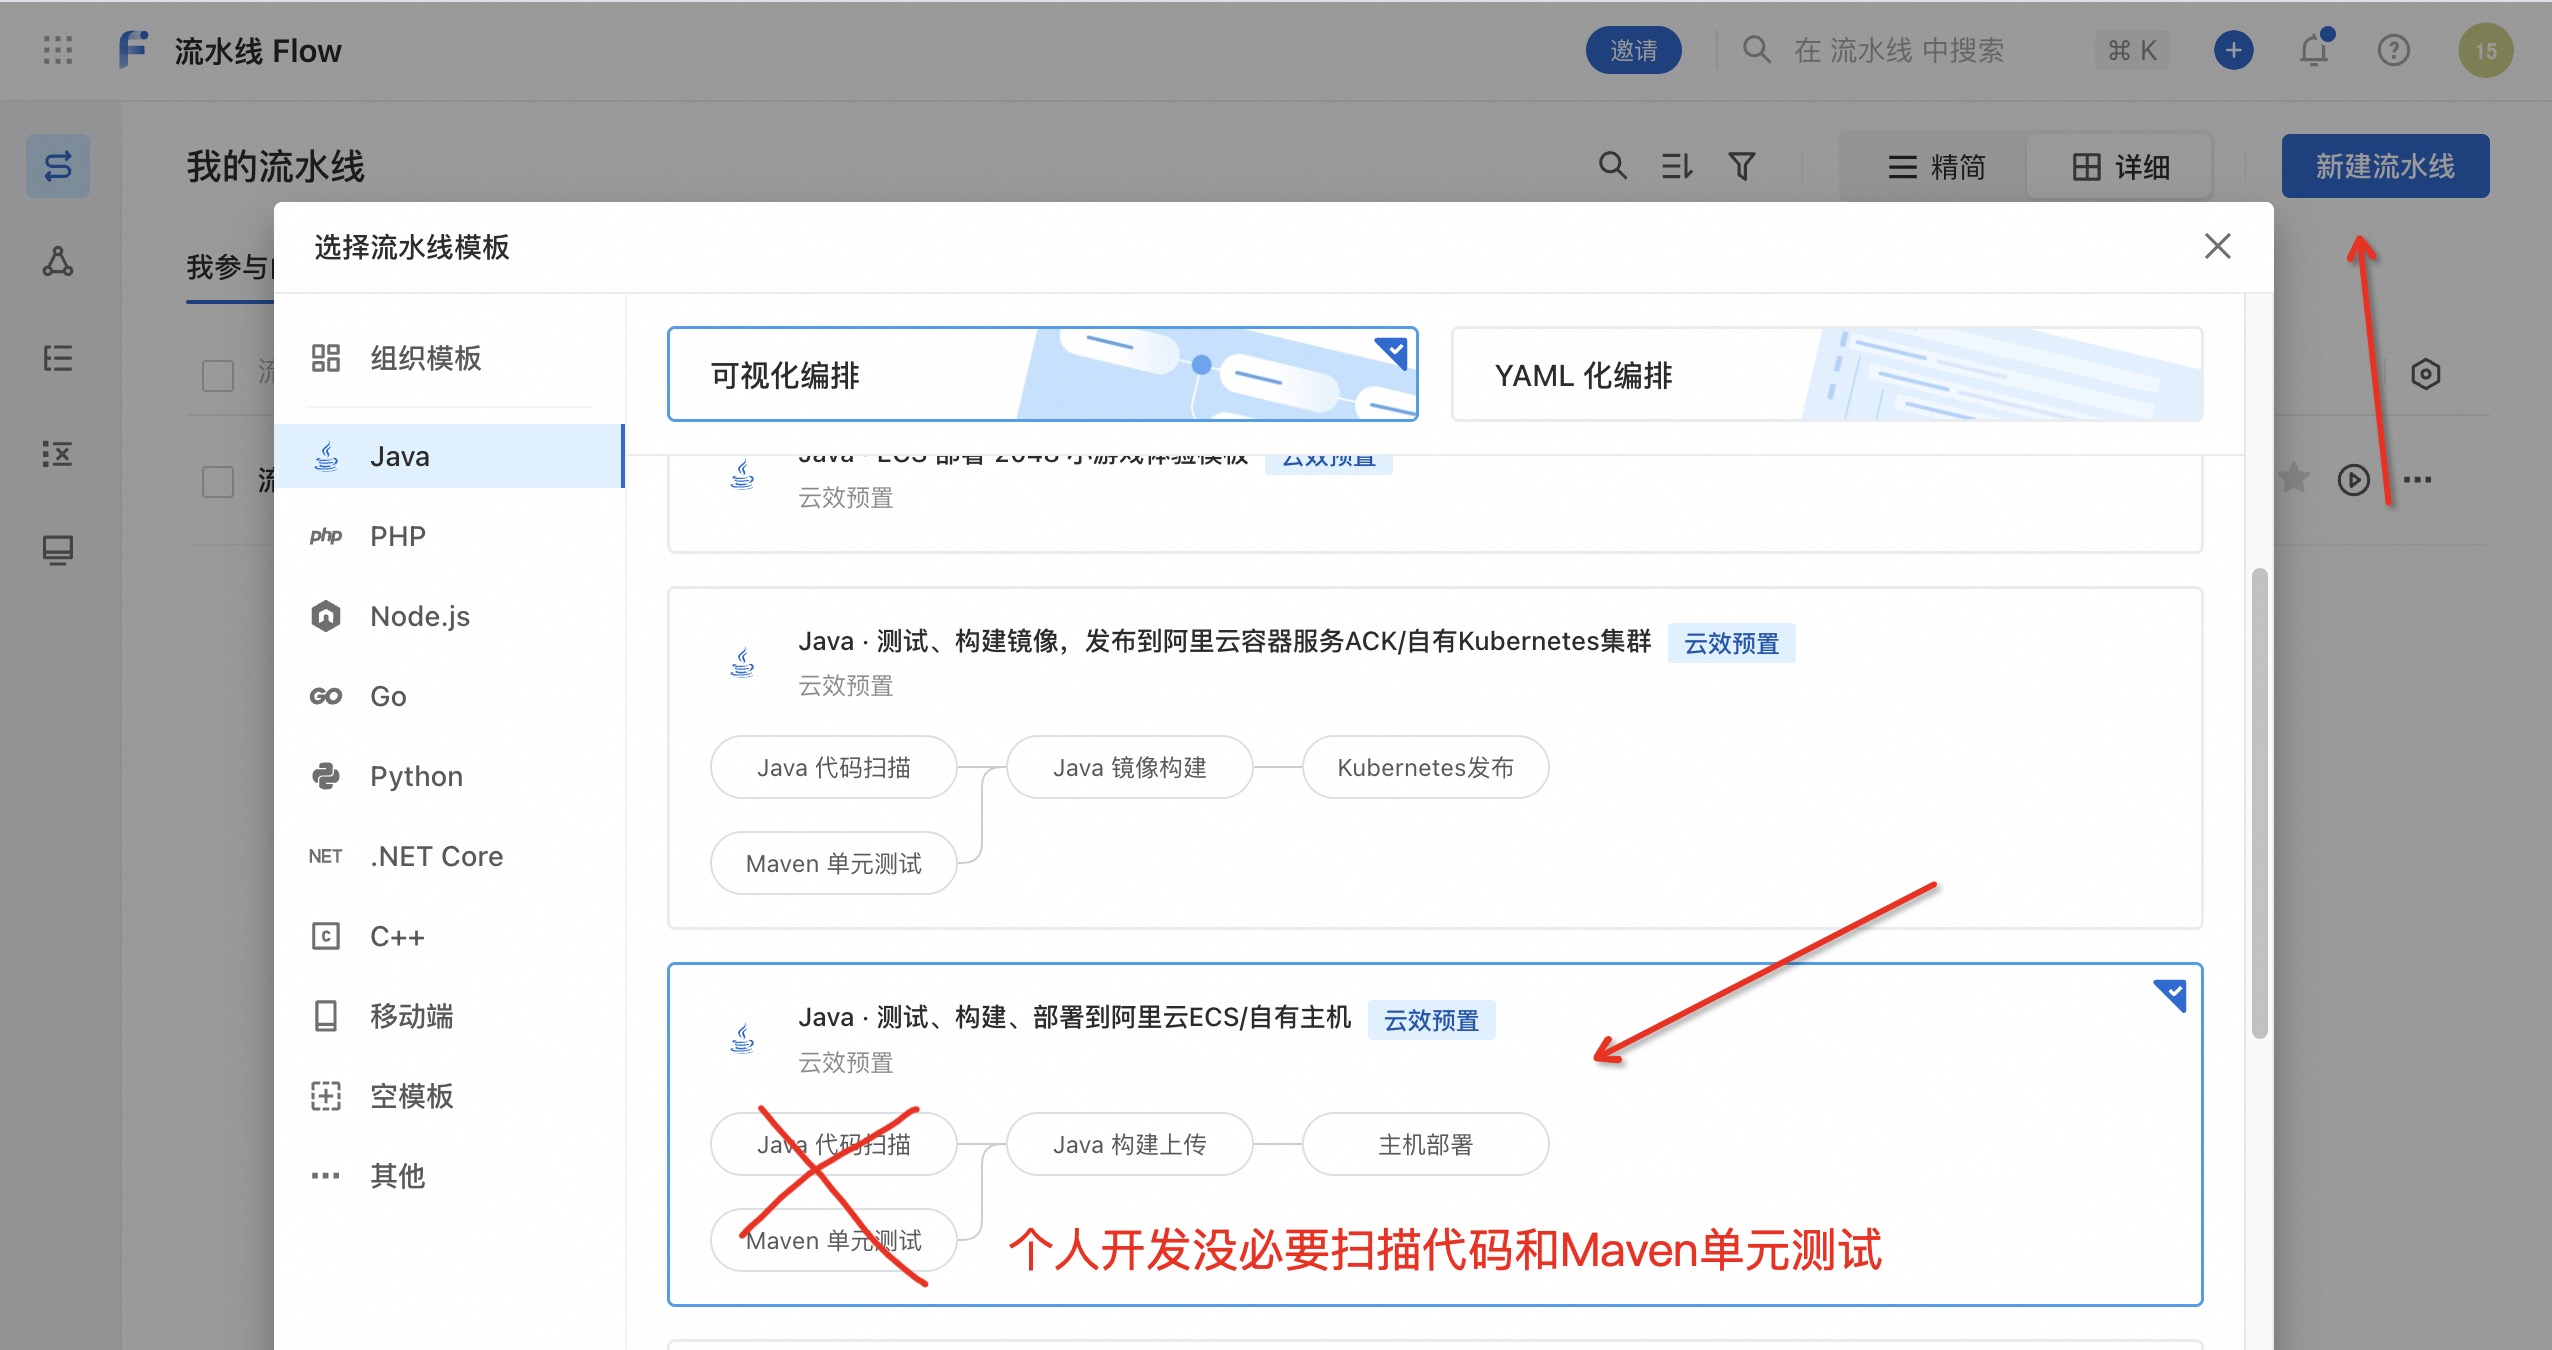
You can choose a process template that includes build upload and host deployment, then remove code scanning and unit testing later.
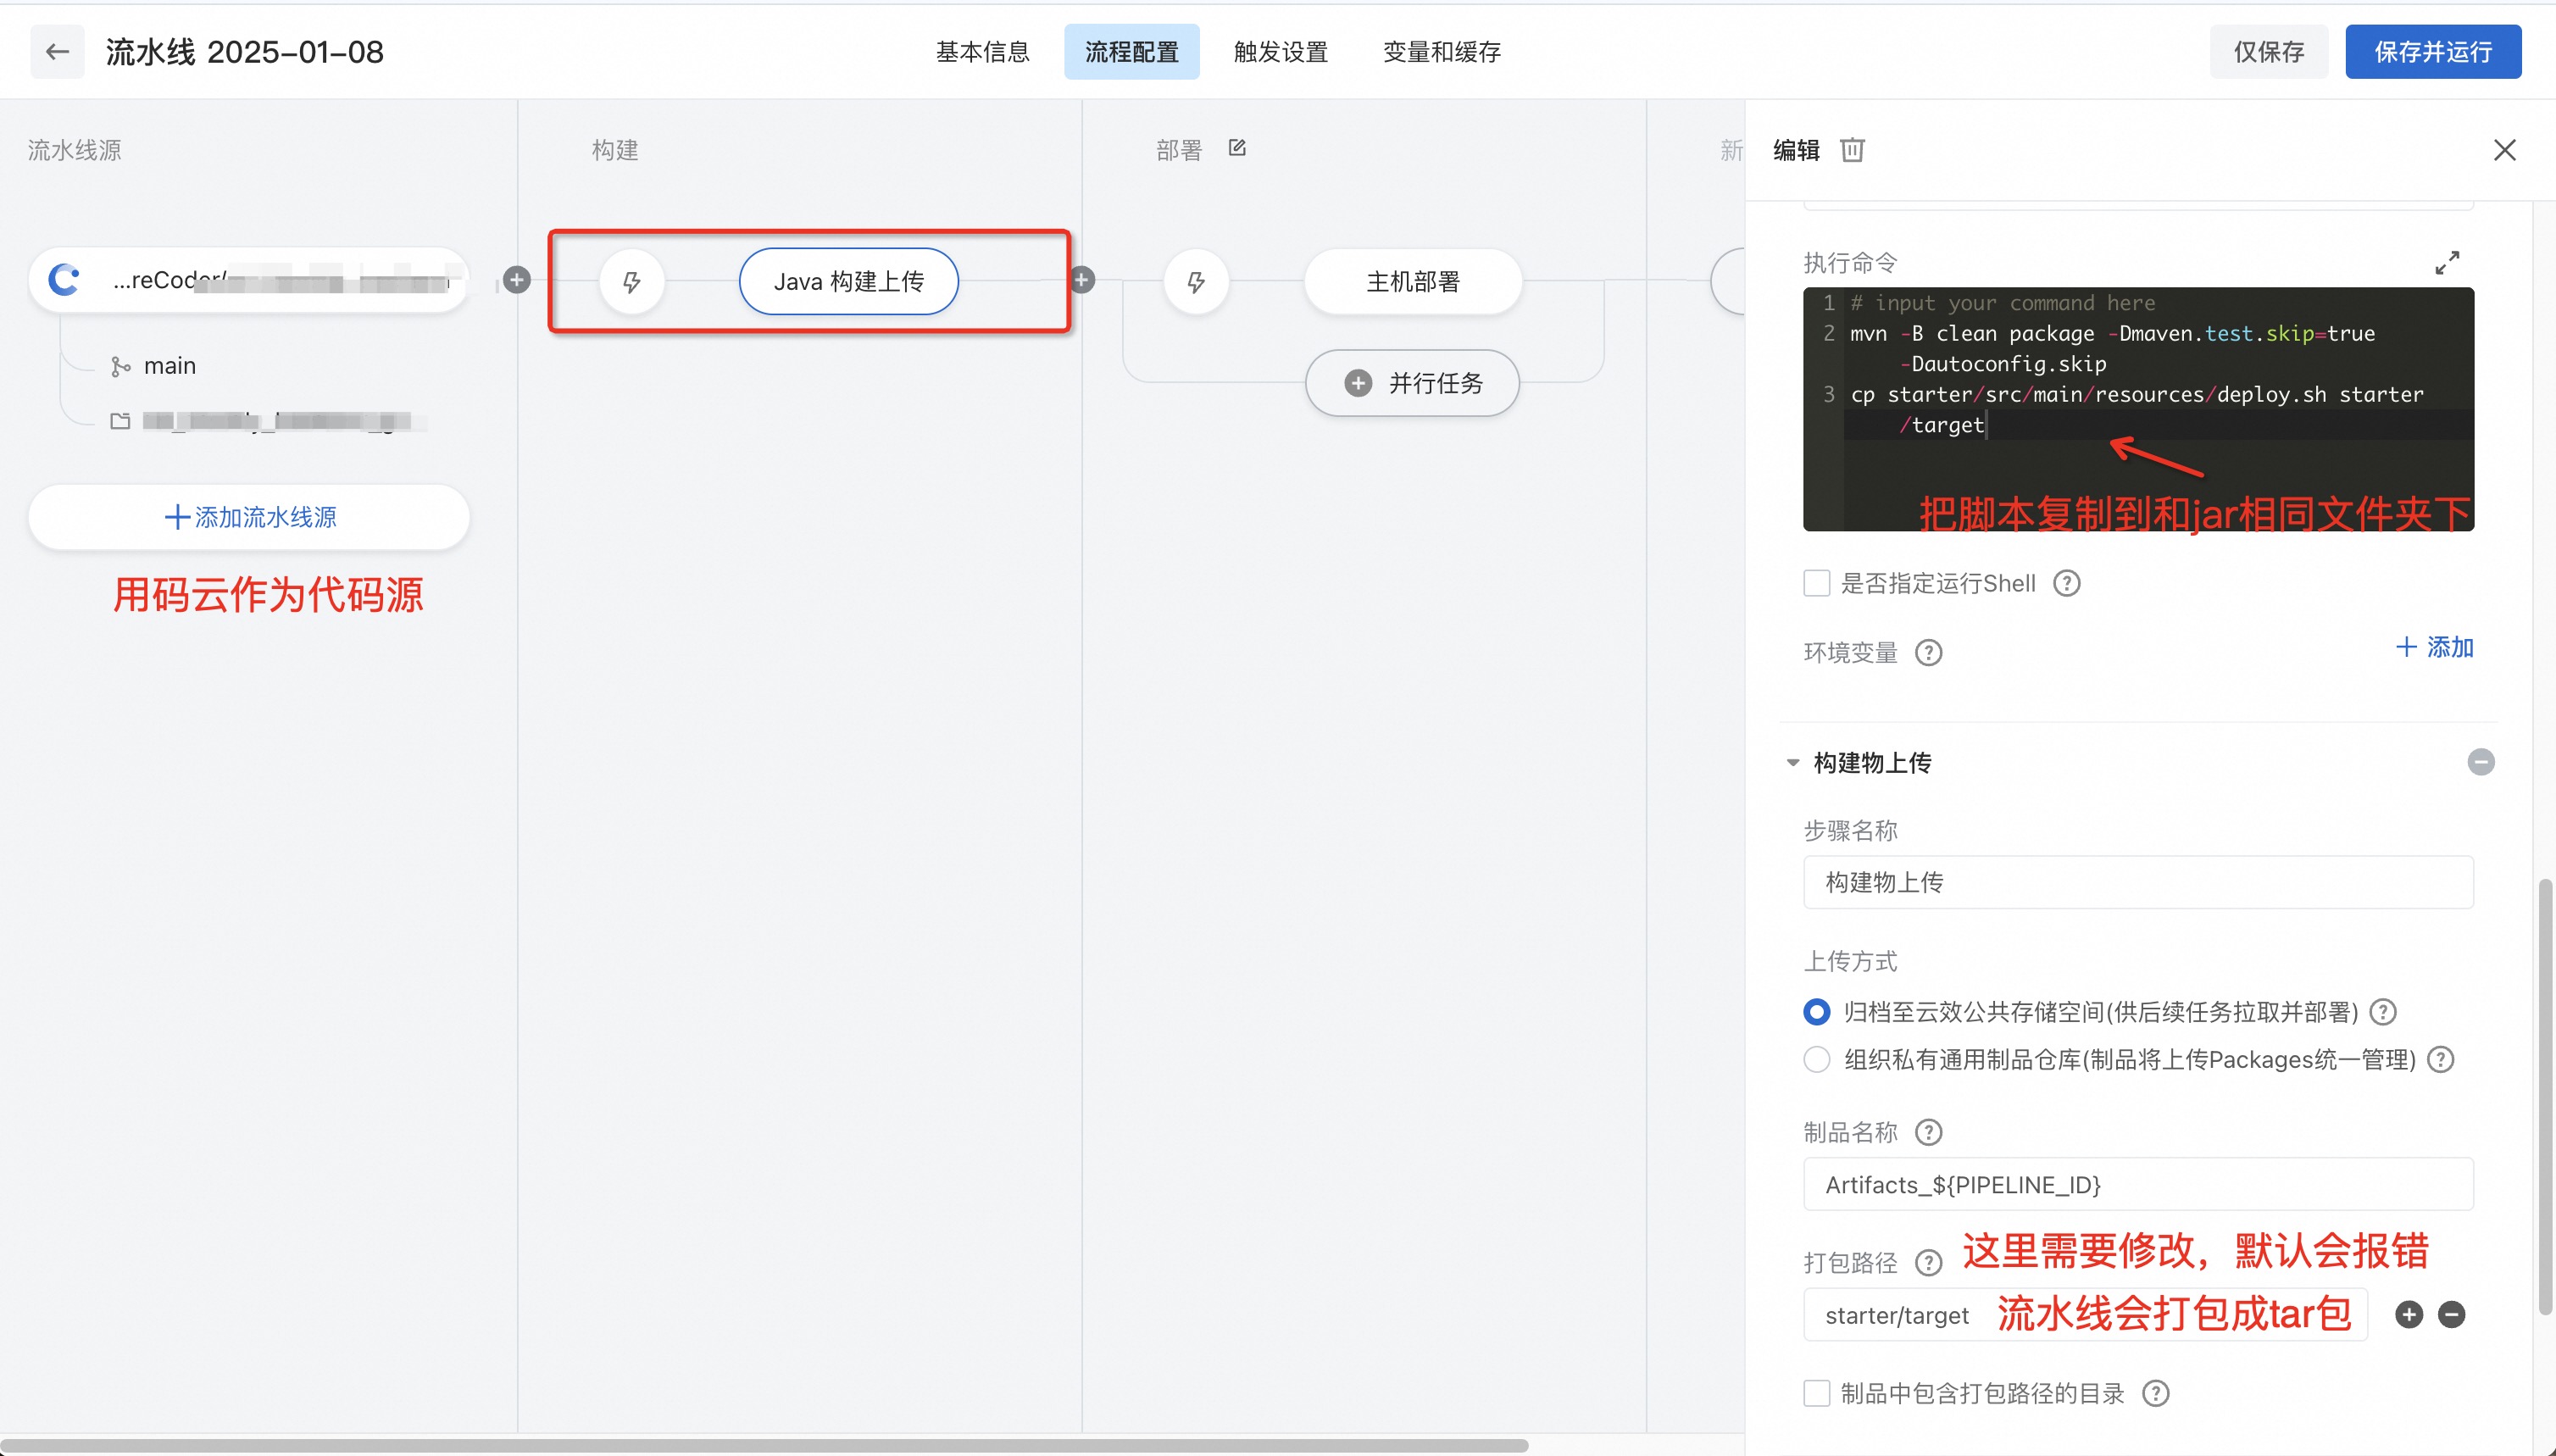
Make sure to modify the build & upload configuration to copy the script into the packaging path, as the default configuration will cause an error.
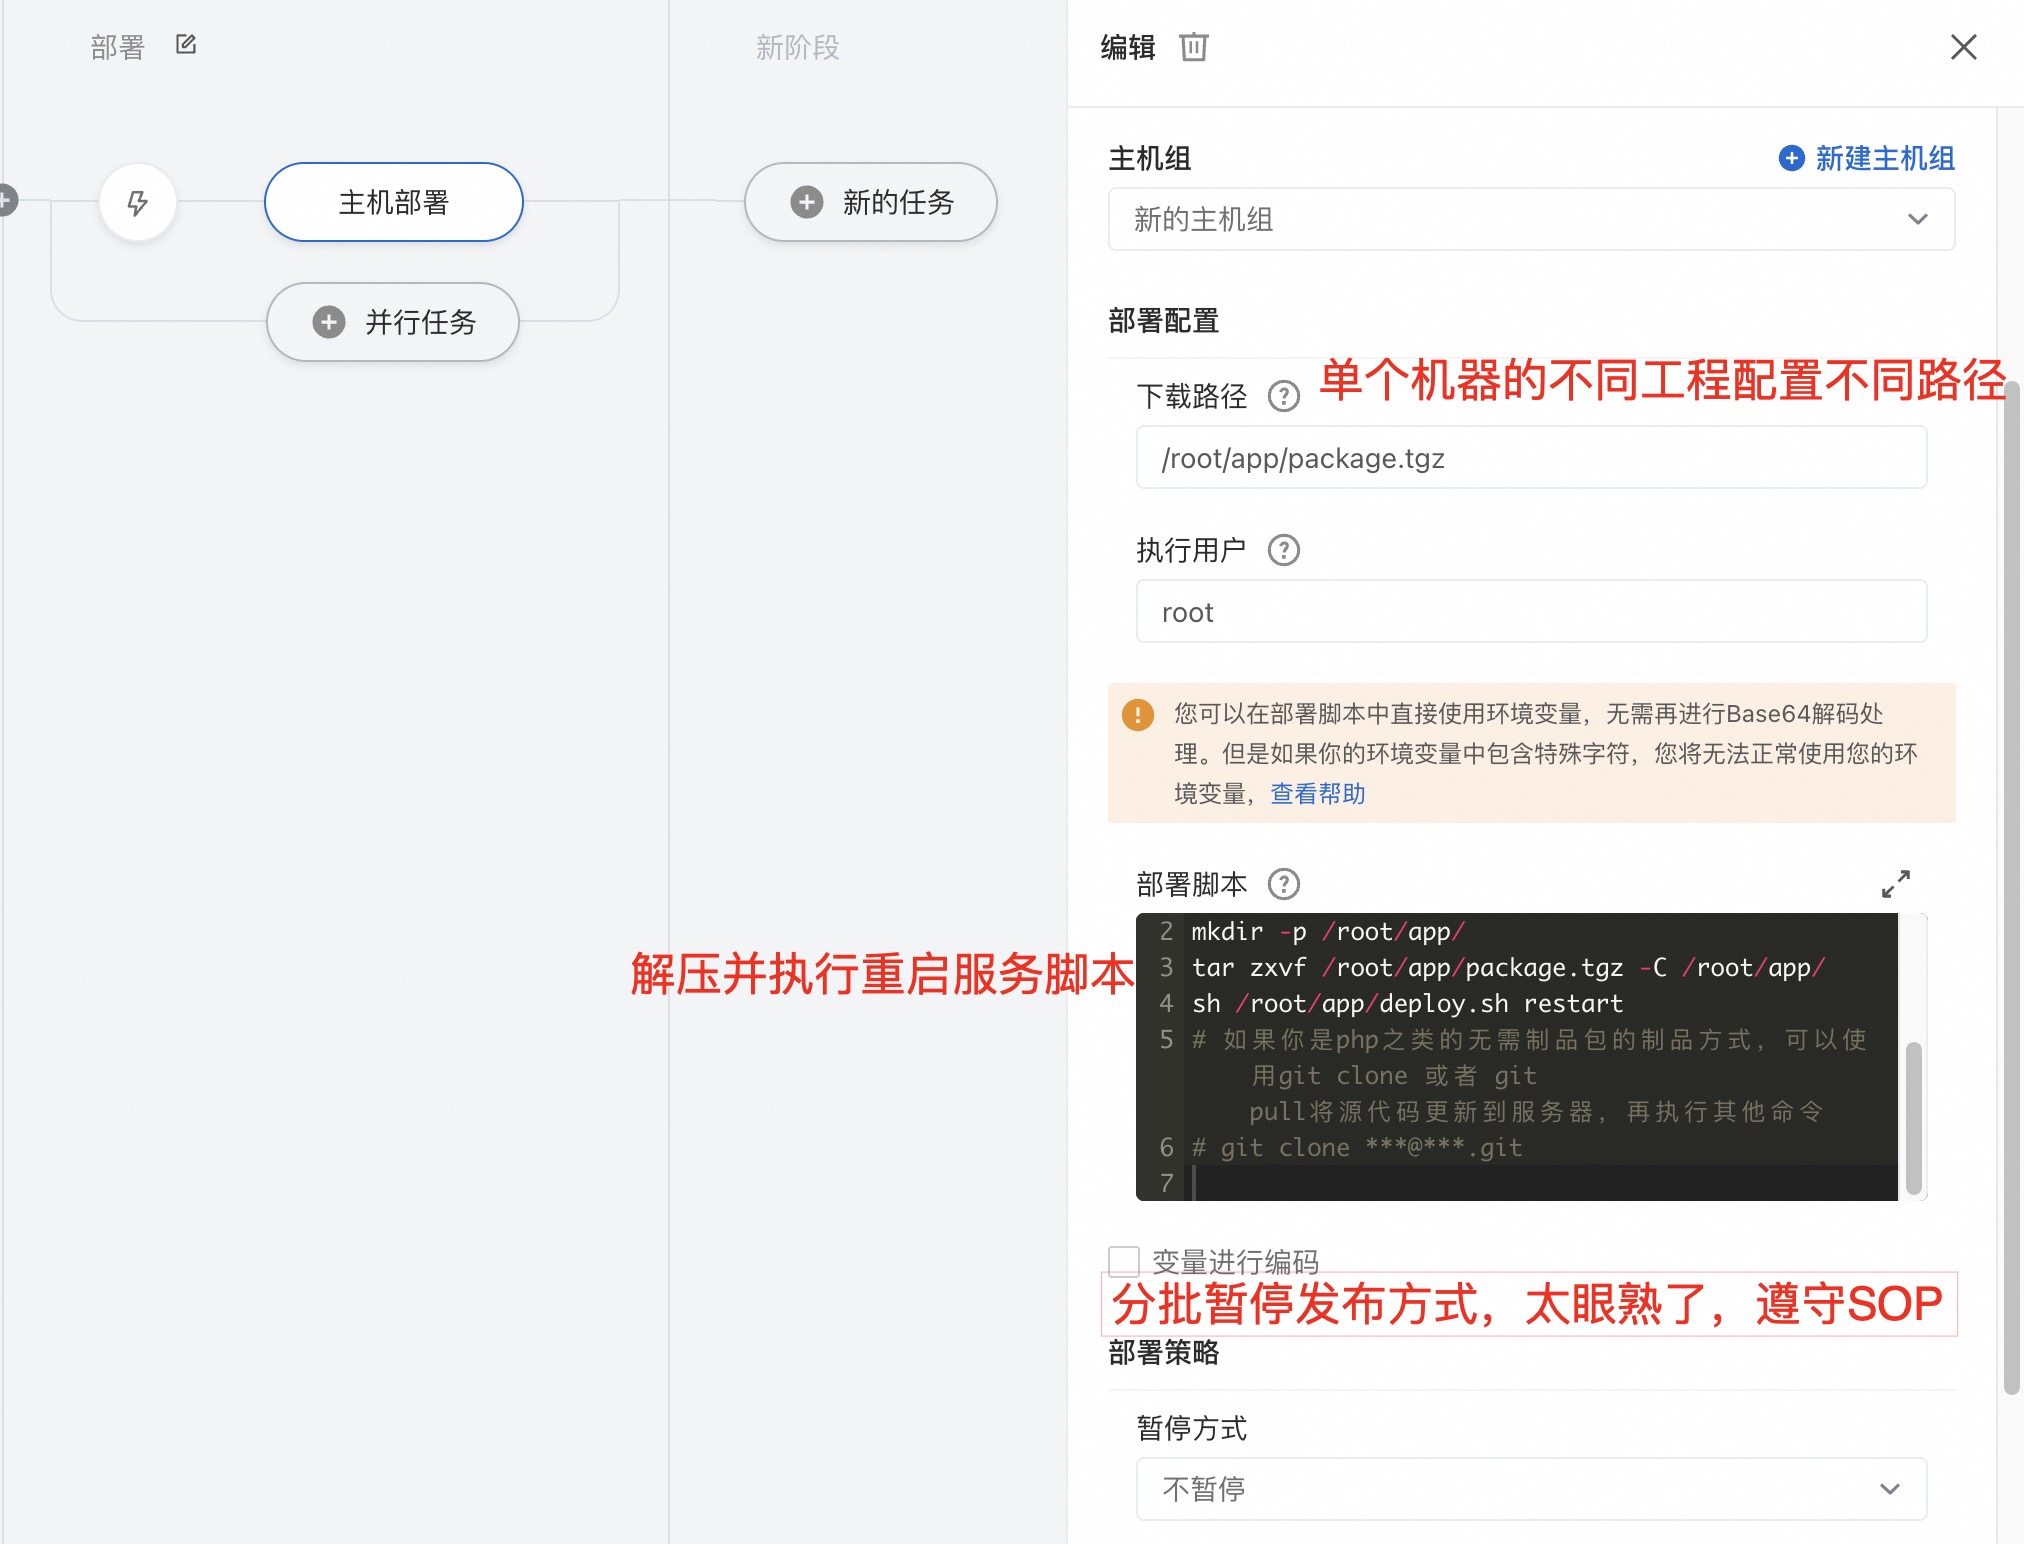
The build & upload artifacts from Java can be deployed to single or multiple machines using different strategies.
Since this is personal development deployed to a single server, there’s no need for any complex SOP—just run it straight through without pausing.
When collaborating with multiple developers or deploying to a cluster, operational SOPs, canary releases, and rollback strategies must be considered.
For hosts, simply execute the command following the guide to register them.
Logging into the Machine to Inspect
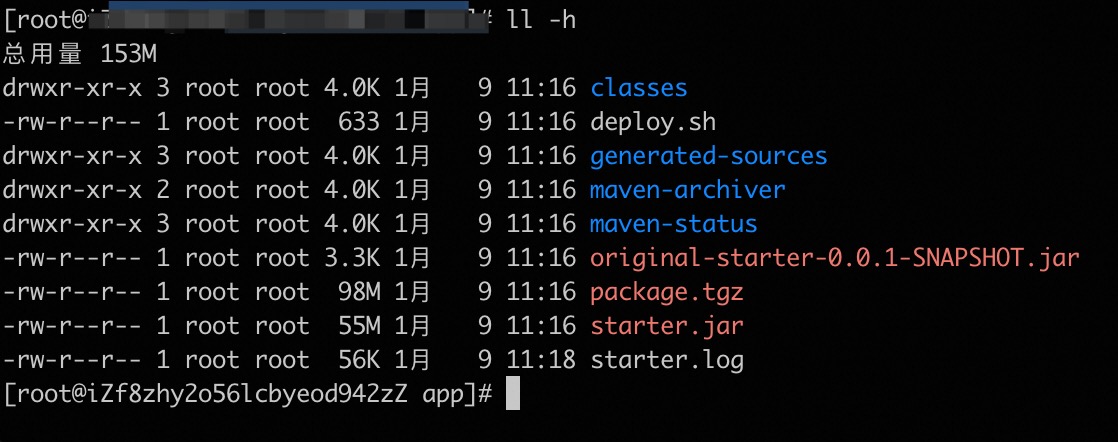
After logging into the machine, check the app directory to observe whether the JAR package and script have been deployed correctly.
Summary
Compared to self-hosting Jenkins, using cloud services is more than enough for personal projects.
Compiling into Docker images is also fine, but for small personal projects, it feels like using a sledgehammer to crack a nut.
Triggering pipeline runs via Webhook is not recommended unless you can ensure every code push is error-free; this trigger method is essentially no different from blindly going all-in.